Pages

Tuesday, December 6, 2016

Implementation of inputColor component

In one of my project I had a use case of storing selected color value in DB and displaying the same stored color on UI.  For this use case I made use of inputColor component, where the picked color from inputColor component is converted into color code before storing in DB. In this blog, I will explain the steps to achieve this feature.

The inputColor component creates a text field for entering colors and a button for picking colors from a palette.InputColor

Steps:
1. Create Entity Object on top of the DB table where color codes are saved.
2. Create a transient attribute(say awtColor) of type, java.awt.Color in the entity object.
3. Create View Object on top of the Entity Object created in Step#1. Add the transient attribute in the View Object as well.
4. Generate VORowImpl class of the View Object created in Step#3.
5. Override Getter and Setter of awtColor transient attribute as mentioned below. 
Getter:
Convert the color code stored in DB to java.awt.Color using Color.decode method.
    public Color getAwtColour() {
        String colorCode = getColourCode();
        if(colorCode != null)
            return Color.decode(colorCode);
        else
            return null;
    }
Setter:
Whenever a new Color is picked from inputColor component, it has to be converted into corresponding color code as shown. 
    public void setAwtColour(Color col) {
        if (col != null) {
  String color= String.format("#%02X%02X%02X", col.getRed(), col.getGreen(), col.getBlue());
            setColourCode(color);
        } else {
            setColourCode(null);
        }
    }
6. Drag and drop VO collection from Data Control as af:table on jspx page.

7. Convert awtColor column attribute from inputText component to inputColor component. jspx code after this code change is:

<af:column sortable="true" headerText="Color" id="c3" width="200">
        <af:inputColor value="#{row.bindings.AwtColour.inputValue}"
                    autoSubmit="true" id="it3">
        </af:inputColor>

    </af:column>


8.  The UI is displayed as:

How to specify min/max date value for an inputDate component.

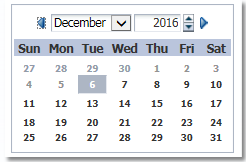
Very often in projects, you get a requirement to restrict an user from selecting a date value before today's date and sometimes restrict an user from selecting a date value beyond today's date. In this blog post, I will explain you with simple steps how to achieve this feature using min and max values of an inputDate component.

1. minValue attribute: the minimum value allowed for a date value.
You can use this attribute to disable past dates before today's date by following below steps.

Step1: Drag and drop an inputDate component on a page.

Step2:  Define a managed bean variable minDate and override the getter of this variable as mentioned below. Here we are setting the minDate date variable to current date.

    public Date getMinDate() {
        try {
            Calendar cal = Calendar.getInstance();
            java.util.Date date = cal.getTime();
            DateFormat formatter = new SimpleDateFormat("yyyy-MM-dd");
            String currentDate = formatter.format(date);
            maxDate = formatter.parse(currentDate);
            return formatter.parse(currentDate);
        } catch (Exception e) {
            e.printStackTrace();
        }
        return null;
    }
Step3: Go to inputDate component and set the minValue attribute to the managed bean variable created in step 2.

                <af:inputDate label="Min Value" id="id1"
                            value=""
                            minValue="#{pageFlowScope.TestBean.minDate}"
                            autoSubmit="true">
                </af:inputDate>

Run the page and see that all the past dates before today's date(6th Dec, 2016) are disabled.  

2. maxValue attribute: the maximum value allowed for a date value.
You can use this attribute to disable future dates after today's date by following below steps.

Step1: Drag and drop an inputDate component on a page.

Step2:  Define a managed bean variable maxDate and override the getter of this variable as mentioned below. Here we are setting the maxDate date variable to current date.

    public Date getMaxDate() {
        try {
            Calendar cal = Calendar.getInstance();
            java.util.Date date = cal.getTime();
            DateFormat formatter = new SimpleDateFormat("yyyy-MM-dd");
            String currentDate = formatter.format(date);
            maxDate = formatter.parse(currentDate);
            return formatter.parse(currentDate);
        } catch (Exception e) {
            e.printStackTrace();
        }
        return null;
    }
Step3: Go to inputDate component and set the maxValue attribute to the managed bean variable created in step 2.

                <af:inputDate label="Min Value" id="id1"
                            value=""
                            maxValue="#{pageFlowScope.TestBean.maxDate}"
                            autoSubmit="true">
                </af:inputDate>

Run the page and see that all the future dates after today's date(6th Dec, 2016) are disabled.  

Wednesday, September 7, 2016

Issue with LOV performance in ADF 12.1.3

I have an LOV defined on an attribute of a view object. The view accessor that fetches data for this LOV is not filtered and queries data from a large table. With LOV created in ADF 12.1.3, I was seeing performance issue while selecting any value in the LOV. 

Also I was seeing the below logs in the Jdeveloper console.

[142211] Evaluating Script with name:null, Type : Groovy. Expression:
[142212]  ( (FormatDesc = :vc_temp_1 ) )
[142213] Evaluation result:false

After debugging for some time, I have found a resolution for this. I need to modify the ListRangeSize parameter to a positive value eg: 10 whose value is by default set to -1 in ADF 12.1.3.

 <ListBinding
    Name="LOV_DrugName"
    ListVOName="DrugDescSearchVA"
    ListRangeSize="10"
    ComboRowCountHint="10"
    NullValueFlag="none"
    MRUCount="0">
    <AttrArray Name="AttrNames">
      <Item Value="DrugName"/>
    </AttrArray>
    <AttrArray Name="AttrExpressions"/>
    <AttrArray Name="DerivedAttrNames">
      <Item Value="ChemicalName"/>
      <Item Value="DrugSerial"/>
    </AttrArray>
    <AttrArray Name="ListAttrNames">
      <Item Value="Drug"/>
      <Item Value="Chem"/>
      <Item Value="DrugSerial"/>
    </AttrArray>
    <AttrArray Name="ListDisplayAttrNames">
      <Item Value="Drug"/>
    </AttrArray>
    <DisplayCriteria
      Name="findByDrugDesc"/>
  </ListBinding> 

How to execute code after a popup is launched

In one of my project, I had a requirement to execute some code after a popup is launched. After struggling for some time, I found a way to implement it. In this post, I will describe you one of the popup client events which can be used to execute a code after a popup is made visible.

Out of many client events that a popup supports, there is an event called popupOpened which is fired once a  popup becomes visible. You can use this event for handling custom code that should be executed once the popup is launched.

Use the below code to implement such behavior.

<af:popup id="p1">
    <af:dialog type="none" closeIconVisible="true"
               resize="off" id="d3">
        <af:panelGroupLayout id="pgl12" layout="vertical">
            ......
            ......
        </af:panelGroupLayout>
    </af:dialog>
    <af:clientListener method="<custom method>" type="popupOpened"/>
</af:popup>

Here <custom method> is the custom method name that needs to be executed.

Wednesday, July 27, 2016

Add/Remove af:messages on a component using javascript

In one of my project, I had a requirement to add & remove af:messages from input components. In this post, I will show the javascript code used to achieve it.
 

For adding af:message to an input component using java script, use the following code.

function customJSMethod(evt){
       var source = evt.getSource();
       var inputComponent = source.findComponent('inputcompId’);
       var message = “Valiation Failing…”;...//Custom message to be added on component.
       AdfPage.PAGE.addMessage(inputComponent.getClientId(), new AdfFacesMessage(AdfFacesMessage.TYPE_ERROR, null, message));
       AdfPage.PAGE.showMessages(inputComponent.getClientId());
}

For removing af:message from an input component using java script, use the following code.

function customJSMethod(evt){
    var source = evt.getSource();
    var inputComponent = source.findComponent('inputcompId’);....
    AdfPage.PAGE. clearMessages (inputComponent.getClientId());
    AdfPage.PAGE.showMessages(null);
}

Thursday, May 19, 2016

Issue with groovy expresssion in ADF 12.1.3

I was trying to define a groovy expression for creating a sequence for one of my entity object attribute.
(new oracle.jbo.server.SequenceImpl("SEQ_NAME", adf.object.getDBTransaction())).getSequenceNumber()

But while trying to create a new record using BC Tester I am getting the following exception.

General error during semantic analysis: JBO-25152: Calling the constructor for class oracle.jbo.server.SequenceImpl is not permitted.

oracle.jbo.ExprSecurityException: JBO-25152: Calling the constructor for class oracle.jbo.server.SequenceImpl is not permitted.


After debugging for some time, I have found a resolution for this. While defining a groovy expression for an entity object attribute, the source code is generated as below.

<TransientExpression trustMode="untrusted"><![CDATA[(new oracle.jbo.server.SequenceImpl("SEQ_NAME", adf.object.getDBTransaction())).getSequenceNumber()]]></TransientExpression>


In order to resolve the above issue we need to make the trustMode attribute to trusted or remove the attribute trustMode as the default value for this attribute is trusted. 

<TransientExpression><![CDATA[(new oracle.jbo.server.SequenceImpl("SEQ_NAME", adf.object.getDBTransaction())).getSequenceNumber()]]></TransientExpression>
  

Thursday, March 24, 2016

Clearing cookies on browser close

In one of my project I had a requirement to clear all the session cookies set in my application on browser close. After exploring for a while I found out a simple configuration in WebLogic Server-specific deployment descriptor, weblogic.xml which will clear all the cookies on browser close. 

In session-descriptor section of weblogic.xml, there is a parameter, cookie-max-age-secs which sets the life span of the session cookie in seconds, after which it expires on the client. Setting this value to -1 expires the cookie on browser close.  Set this value as mentioned below.


Friday, October 23, 2015

How to install Apache Ant and run build script from command prompt

In this post, I will explain you the steps to install Apache Ant and run ant build script from command prompt.

Following are the steps to be followed to install Apache Ant.

1. Download Apache Ant's zip file from Apache Ant official website.
For example : apache-ant-1.9.5-bin.zip, unzip it to the folder where you want to store Apache Ant.


2. Make sure JDK is installed. And configure JAVA_HOME as environmental variable.


3. Configure ANT_HOME environmental variable as shown. In my case C:\apache-ant-1.9.5 stores Apache Ant.


4.  Set ANT_Home's path.


After the above steps, when you run the command ant -v from command prompt it should show you the following details:

 which means ant is setup successfully.

Follow the steps to run build script from command prompt.

1. Open command prompt and run the following command.

ant -f C:\Umesh\Code\Device.com\Portal\build.xml build 

Here C:\Umesh\Code\Device.com\Portal\ is the folder location where my build script exists.

2. Once you hit the above command, the script start executing as shown:


Once the script is run successfully, it will display confirmation message in command prompt.

Friday, April 10, 2015

How to generate HTML Javadocs using Jdeveloper

In this blog, I will explain the steps to create HTML Javadocs using Jdeveloper.

First add Javadocs for all the classes and its methods using  /** */.

Then follow the below steps to create HTML Javadocs.

1. Select the folder/file for which you want to create HTML Javadocs.

2. Go to Build menu and select Javadoc com.test to create HTML Javadoc.

3. Once the Javadoc is created, you should see the below message in the logs.


4. To view generated Javadoc for a specific class, Go to Java Doc in Navigate menu and search for the file.


5. Alternatively, you can go to the folder where Javadoc HTMLs are created.
In my case: C:\Jdeveloper\mywork\TestJavaDocApp\Javadoc\javadoc.
Click on index.html to view HTML javadocs.


Friday, June 6, 2014

Use case of scrollComponentIntoViewBehavior

The scrollComponentIntoViewBehavior tag is a declarative way to have a command component  scroll a component into view and optionally set focus on it. scrollComponentIntoViewBehavior.

In this post, I will explain a use case of scrollComponentIntoViewBehavior tag to scroll and set focus on a component in a page.

UseCase:
In a webcenter application, if you have a menu defined as mentioned below.


where all the selections(i.e Calendar, Choose Date etc.) are mapped to the same page i,e if a user selects any of these options, he/she is navigated to the same page but with the selected option/section scrolled and focused into. It is similar to anchor tag for jumping on a specific location of a page.

Steps implemented are:
1. Create a Webcenter Portal Framework Application.
2.Create a new jspx page. (eg: news.jspx). In this page, define the various components to set focus on based on selection in navigation menu.
3. Define the navigation menu as mentioned above.
  • Go to default-navigation-model & delete the default pageHierarchy
  • Click on Add new node and select link from various options. Modify Id, Type, URL, URL Attributes for the Home page as shown below.


  • Add another node of type link below Home as Calendar. Set the Id, Type, URL, URL Attributes for the new page. Additionally set a URL parameter for this node as shown below.


    Here the url parameter section is assigned value: pt1:pb1 which is clientId of the component to set focus on when Calendar is chosen from the navigation menu.
  • Repeat the above steps to add other nodes(Choose Date & Choose Color).
4. Define a command button with visible property set to false. Add scrollComponentIntoViewBehavior inside it as shown below.

Here the componentId property of scrollComponentIntoViewBehavior is set to #{param.section}.

5. Define a client listener method scrollToComponent on page Load. The java script code is

function scrollToComponent(loadEvent) {
     var id = "pt1:command1";
     var t = document.getElementById(id);
     t.click();
}


when the user selects any option(i.e Calendar, Choose Date) from the navigation menu, the page news.jspx is loaded which triggers the above java script and in turn clicks the command button and invokes scrollComponentIntoViewBehavior tag. 

Based on the url parameter set in the default-navigation-model the navigation jumps to the particular section of the page.

Sample workspace:
Download the sample workspace from here.

Saturday, September 21, 2013

Hide move all/remove all buttons from SelectManyShuttle component

In one of the earlier post, I explained how to implement SelectManyShuttle component. In this post, I will show how to hide move all/remove all buttons using skinning.

Generally SelectManyShuttle component looks like:


The skinning to hide move all/remove all buttons is:
af|selectManyShuttle::moveall-horizontal,
af|selectManyShuttle::moveall-vertical,
af|selectManyShuttle::removeall-horizontal,
af|selectManyShuttle::removeall-vertical{display:none}
The SelectManyShuttle component after skinning:

Sunday, April 14, 2013

Use case of Inlinestyle & ContentStyle

In this post, I will explain a use case of InlineStyle and ContentStyle on ADF UI components.

In one of my project I had a requirement where in I have to display few rows of table in bold if a specific criteria is met. The other rows where criteria is not met should be displayed as normal.

- Select columns in the table which you want to display in bold.

- Select the Style tab for the selected output text in the property inspector and set the inline style as below:


- Here the criteria is Salary should be greater than 10000. The column code looks like.


UI

If you want to apply similar style for the content of an InputText component, then make use of ContentStyle property rather than InlineStyle property as shown

Here in addition to bold, the content of InputText is right aligned.

UI

Thursday, January 31, 2013

Defining a tool tip message on Table column label

In one of my earlier post, I explained how to define tool tip for Table Column Filter. In this post, I will explain how to define tool tip message/short description on a table column label.

- Select the column in the table for which you want to define tool tip.

- Expand Column facets node for that column and select header facet.

- Inside the header facet add an Output Text component and set it's value property same as column header text as shown:


 - The custom tool tip for the table column label can now be set on the shortDesc property of Output Text. After this modification, the column code looks like:


UI

Wednesday, January 30, 2013

Implementation of SelectManyShuttle component

The selectManyShuttle provides a mechanism for selecting multiple values from a list of values by allowing the user to move items between two lists. SelectManyShuttle

Use-Case:
The mapping between two entities should be persisted in a third database entity.

Say, there are three tables in an application, EMP, ROLES & EMP_ROLES. The EMP table is shown as a form layout allowing the user to navigate between the records, create a new record, update an existing record & commit all the changes. The SelectManyShuttle component is used to display all  the ROLES like Manager, President etc. For an EMP record, the user can select multiple roles and shuttle them to the right. 

When a user shuttle any Role to the right for an EMP record,  an entry is made in EMP_ROLES Table and vice versa. The EMP_ROLES table contains all the ROLES selected for an EMP record. And while navigating between the EMP records, the corresponding ROLES saved in the EMP_ROLES db table are displayed as selected.

The UI looks like:


 Steps implemented are:
1. Create a Fusion Web Application using jdeveloper.
2. Create all the required Business Components (EO, VO,VLink AM) for the above data model.
3. Don't forget to create a view link between EmpVO and EmpRolesVO, which will be used to display the pre-selected roles for an EMP record. The data model will be as shown:


4. Drag and drop the EmpVO as a form layout with navigations.
5. Drag SelectManyShuttle UI Component and bind the value property of it to a managed bean property, which evaluates the values to be displayed as selected for an EMP record as shown:


where getSelectedRoles method is:


6. When any Role is shuttle to the right, first it is saved in a pageFlowScope variable, then it is processed in the commit method as shown:


7. When user navigates between the records, getSelectedRoles() method is called, which will fetch the ROLES for an EMP record and then display them as pre-selected in SelectManyShuttle component. Partial triggers is set on the SelectManyShuttle component wrt to the navigation buttons as shown:


8. The user can clear the selection made in the SelectManyShuttle component by clicking the Clear button. The code to clear selection is as shown:


Sample Workspace:
Download the sample work space from here

Tuesday, November 27, 2012

How to implement cascading LOV's in search criteria

Cascading LOV is a common requirement. It is dependencies of an LOV on the selected value of another LOV. In this post, I will explain how cascade LOV can be implemented in a search criteria form.

Use Case:
Searching all the employees reporting to a manager in a department. For this, cascading LOV has to be used to define the dependencies between departments and the list of all employees in that department. i.e one LOV on DepartmentId and another LOV on ManagerId to retrieve all the employees in the selected DepartmentId LOV.

Steps:
1. Create Read Only view Objects on Employees, Departments table. (hr schema is used)
     Say EmployeesVO and DepartmentsVO
2. Define a view criteria (findByDepartmentId) in EmployeesVO to filter all the employees based on a DepartmentId.


3. Add DepartmentsVO and EmployeesVO as view accessors to EmployeesVO. In the added Employees view accessor, shuttle the view criteria(created in step #2) to the right. Provide the value for the bind variable as DepartmentId.


4. Define LOV's on DepartmentId (wrt Departments view accessor) and ManagerId (wrt Employees view accessor). Once a Department is selected in Department LOV, DepartmentId attribute will hold the value of selected department. This selected value is passed to the findByDepartmentId view criteria as defined in the above steps.

5. Define a view criteria (findByDepartmentMgrId) in EmployeesVO, which will be dragged and dropped as a query component on jspx page.


6. In the view controller project, create a jspx page. Drag the view criteria defined in the above step as query component. 


7. Run the jspx page. Dept Id LOV will show all the departments, while Mgr Id LOV will show all the employees for the selected Department. After selecting the Dept Id and Mgr Id values, click on Search button. The resultant table will show all the employees reporting to the selected manager of the selected department.


Sample Workspace:
Download the sample workspace from here.

Monday, September 17, 2012

Navigate to a different page upon successful login in web center portal application

In this post, I will describe how can an end user navigate to a different page upon successful login in a WebCenter Portal application.  By default the user is navigated to home.jspx page. But if the user wants to navigate to a different page, he/she can configure it in faces-config.xml.

By default the generated faces-config.xml file in a web center portal application looks like:  


Upon successful login, the home page is displayed:


Modify in faces-config.xml, such that the navigation-case points to a different page (ex: About Us)


Upon successful login, the user will be navigated to About Us page:

Friday, September 14, 2012

How to set classpath in weblogic server

Developers like me might have struggled to figure out a way to set some jars in the CLASSPATH of the weblogic server to access and load the correct Java classes when the server starts. So, I thought of putting my solution in this blog, which might be useful for some developers.

Basically you need to modify the WEBLOGIC_CLASSPATH environment variable in commEnv.cmd file located at <WL_HOME>\common\bin

In my case it is C:\11.1.1.6\wlserver_10.3\common\bin\commEnv.cmd

Append the WEBLOGIC_CLASSPATH variable at the end with the location of jars to be loaded as below:
set WEBLOGIC_CLASSPATH=%JAVA_HOME%\lib\tools.jar;%WL_HOME%\server\lib\weblogic_sp.jar;%WL_HOME%\server\lib\weblogic.jar;%FEATURES_DIR%\weblogic.server.modules_10.3.5.0.jar;%WL_HOME%\server\lib\webservices.jar;%ANT_HOME%/lib/ant-all.jar;%ANT_CONTRIB%/lib/ant-contrib.jar;C:\Users\uagarwal\Downloads\lib\tdgssconfig.jar;C:\Users\uagarwal\Downloads\lib\terajdbc4.jar;
Here, I have set 
C:\Users\uagarwal\Downloads\lib\tdgssconfig.jar; 
C:\Users\uagarwal\Downloads\lib\terajdbc4.jar; 
at the end of the WEBLOGIC_CLASSPATH. 
Alternatively, you can put the jars in <WL_HOME>\server\lib where other jars are present. But don't forget to restart the server, in order to pick the latest classes by the server.

Using managed property to evaluate bindings

In this post, I will describe how to get hold of DCBindingContainer using managed property.

Managed property is a bean attribute that is exposed through getter and setter methods in a managed bean. The <managed-property> element is a child of <managed-bean> element in adfc-config.xml. It calls its equivalent setter method defined in the managed bean upon bean initialization. Managed property must have a name and a value.
                                                  Managed property can be defined in adfc-config.xml to have an expression always evaluated and ready for use. For example, a managed property can be used to evaluate #{bindings}, which is used to get hold of DCBindingContainer.

For this, define a managed bean and register the bean in adfc-config.xml file. In adfc-config.xml, select the bean, where a managed property has to be defined. Click on Add(+) button to add a managed property:


after the modification, the source code looks like:


In the bean define getter and setter for the managed property as:


You can use (DCBindingContainer)getBindings to get hold of DCBindingContainer as shown above.